Basic Skills in Tanning
Tanning of animal skins or hides has been done by all people on all continents to make a clothing material that is supple and resistant to decay. It is one of those autochthonous skills that make me wonder how did early people all figure out this process of basically first letting it rot a little, scrap it, wash it then pound the brains of an animal in it and finally smoke it and it would make supple, beautiful, comfortable, pleasant smelling material for making clothing; but they did and I am going to share with you how I teach my student to do the same thing, as well as making material suited for making drum heads, tools, containers, and more.
The lexicon of Tanning
For our discussion, this is how I am using these teams.
- Collagen – a protein which forms the fiber bundles of the skin as well as tendons, ligaments. It is what the gelatin in Jello is made from and one of the traditional glues.
- Tanning – To modify the protein or collagen making the fibers of skin to prevent them from putrefying or degrading.
- Mineral, Chrome, or Chemical tanning– a process typically using chromium sulfate salts to displace the water withing the collagen and presserve the collagen.
- Oil or Brain tannin – the use of proteins to displace the water within the collagen and preserve the collagen.
- Vegetable or Bark Tanning – the traditional tanning process which uses the tannins within plant material such as bark, leaves, and walnut hulls.
- Hide – the skin of a big animal such as buffalo, horse, elk, cattle…
- Skin – the skin of a smaller animal such as deer, antelope, goat…
- Fur or Pelt – the skin of a fur barring animal such as rabbit, beaver, bobcat, coyote.
- Green skin or hide – untanned but stretched, fleshed, and dry
- Grain – the outer part of the skin that contains the pattern of the follicles and will give the finished less supple.
- Graining – the act of removing the hair and top grain
- Grained – the grain has been removed.
- Membrane – the part of the skin that contains the blood vessels.
- Membraning – the act of removing the grain.
- Membraned – the skin or hide after the membrane has been removed.
- Dressing – the repacing the water that was in the skin with the tanning solution.
- Rawhide the skin or hide that has only had the hair and membrane removed then is stretched and dried, and no other processing is used is great for making snowshoes and drums heads.
- Full Grain Leather has had the membrane and hair removed but not the grain.
- Buckskin – a traditional processed skin that the top grain has been removed, the skin was dressed or processed with oil, fat, or protein. We use brains or eggs, and the skin is smoked to make it unaffected by water.
- Barktanned – a traditional process of tanning leather using the tannic found in plant material such as oak bar and black walnut hulls.
My 2 Cents
The first time or two you make buckskins It will behoove you to have a mentor look over your shoulder. In 1970, with a correspondent course tanning manual, fleshing beam, and fleshing knife I proceeded to work hard to make disappointing results, but within a minute of watching a skilled tanner, I learned what I was doing wrong. Words on paper, a photo, or a video are no substitute for a good mentor to demonstrate graining or membraning. It is easy to do these tasks once you understand the kind of edge needed on your knife, the proper angle, proper technique of staying under the grain and not rolling over it, and to truly understanding you are splitting the gran free from the skin not scrapping it off.
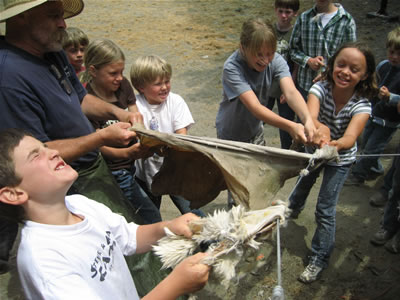
Primitive skills gatherings like Buckeye, Winter Count, and Rabbit Stick are great venues to learn brain tanning with skilled experienced mentors such as Tamara Wilder. Tamara is a good friend and author of Buckskin: The ancient skill of brain tanning. She conducts excellent workshops and maintains a schedule of tanning classes held throughout the US. Many of the photos in this post are of Tamara.
NOLI also offers brain tanning workshops, total immersion youth tanning, and primal skill camps.
Fall is the time for deer harvest but late tanning should not be started unless there are two or more days of dry warm sunny days. But what you do today will determine the quality of the buckskin you make in May.
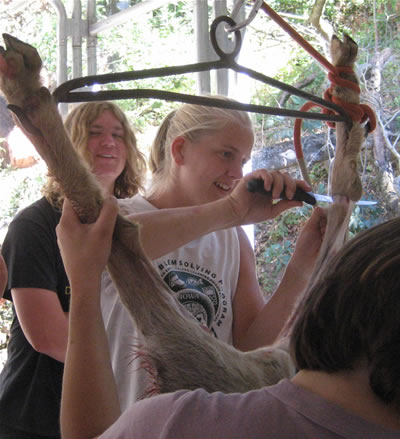
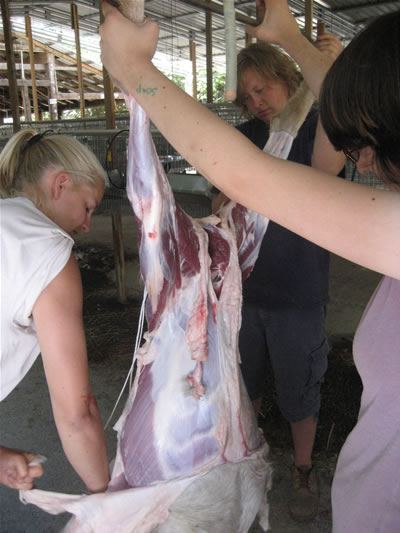
Skinning
The key is to leave no knife marks on the skin. After you make the initial cuts around and down the hocks, and the sternal cut, put the knife away, if you have to lock it up in the truck you don’t need it again until the skin is off the carcass. If you think you do, you don’t, just use some more muscles. Many people that have spent a lifetime hunting think they have to use that expensive skinning knife to separate the skin from the carcass every inch going down what they will most likely be left with is a skin that has parallel cuts in the skin that will become holes in the spring when the grain and membrane are removed from the skin. Fell Membrane Superficial fascia and the subcutaneous fat should remain on the carcass, not on the skin. To do this force your fingers between the skin and the fell, make a fist and pound it down between separating the skin from the fell. FYI: In Haiti when teaching these classes I learned that they use air blowing in a reed pushed up the leg and tied. By the time this is done the animal looks like a balloon. Next fall we will be doing this with compressed air.
Fleshing
Any muscle and fat must be removed or the skin may fail in spots do to what is known as a fat burn. Do not spend much time doing this it really is a quick scrapping of fat and pulling off any superficial fascia adhered to the skin. This is not the time to try to remove the membrane, it will be much easier to do this come spring when the hold between the membrane and skin begins to fail.
Salting
I pour about a pound of cheap granulated salt on to the skin and work it in with going to the outside edge. This will draw mucus from the skin out and may get trapped under the skin. Be mindful to not let this occur. In a day or two if the salt is damp redo this process. Stowing The Skins Over Winter In a plastic tub that can be sealed place enough 2x4 or 2x2 on the bottom so that the bottom skin will at no point sit on the plastic which prevents moisture from getting trapped between the plastic and the skin. Fold the skin from side to the center near the center without overlapping. The key is the skin needs to lay flat with salt in between the flesh to flesh all the way to the edge.
Now fold the skin fur to fur so it will fit and lie flat on the wood. Try to minimize the skin touching the sides of the tub so liquid will not get trapped between plastic and skin. About a half dozen skins can be stacked in the tub in this manner and stored in a dark, cool, rodent-free place for several years. I have had good luck with skins stowed like this for 4 years I would guess they will last indefinitely. Next Steps Over the winter collect more skins from hunters, you might want to offer to skin their deer and goats to guarantee that the skins are free of score marks. If someone wants to give you skins with lots of score marks, thank them because you will want to make hide glue. You will typically need two or more skins for a shirt, three or more for pants. You might also want to save some intestine and sinew for cordage You will also want to collect nice white had wood ash to make lye storing it so it is dry. You will also want to find an old bucket, and collect punking fir wood to smoke the skins.
Bucking – (SKIP THIS STEP IF TANNING WITH THE FUR ON)
Bucking does four things for you: First it aides in loosened the hair. Secondly, it aids in separating the outer skin or grain from the part of the skin you will make buckskin from. Thirdly, because it is a base, ie., an alkaline solution (made up of potassium hydroxide) it reacts with the mucus in the skin, which is an acid. The reaction produces salt and gas, helping to push the mucus out of the skin. The point of the tanning process is to displace moisture and replacing it with the tannins or protines of the tanning solution, so this step sets the stage to make dressing to be much more effective. Fourth It will de-grease the skin, which also aids in the dressing prosses.
We will use wood ash for this process. When burning wood the potassium does not burn, therefore in ash is high in what we need to make our alkaline solution. Hardwood ash has more potassium than softwood ash. Many say that you can only us hardwood as, but what we have found is it simply takes more ash to make up extract the needed potassium. We also want to use the white ash from a hot fire, the black ash is high in charcoal which is not only low in potassium but may discolor your buckskin. Many believe that their water is alkaline enough and don’t use any ash and still make beautiful buckskins, we have found that by raising the alkalinity of our water we produced a thinner more supple skins.
The determine the proper concentration of your potassium hydroxide solution you could use pH strips or a pH meter, but floating an egg has worked fine for tens of thousands of years. A fresh egg should float with just a quarter-sized ring of one end floating above the water; if less than that add more ash, if the egg is on its side add water.
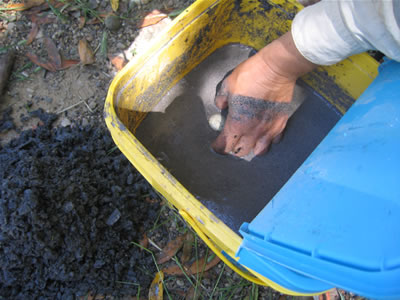
Bucking Floating an egg to determine proper concentration of hard wood ash, Then soak hide until hair slips. The high Ph of the ash water pushes the mucus out of the skin so that the brains in a later step will absorb into the skin more readily. The skin should soak until the hair pulls free easily. If the water is about 70 degrees it should slip by Saturday morning when the real work begins.

Graining – (SKIP THIS STEP IF LEAVING FUR ON OR MAKING FULL GRAIN LEATHER OR RAWHIDE)
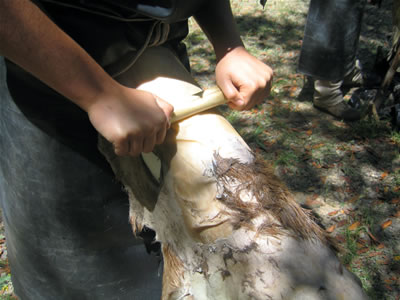
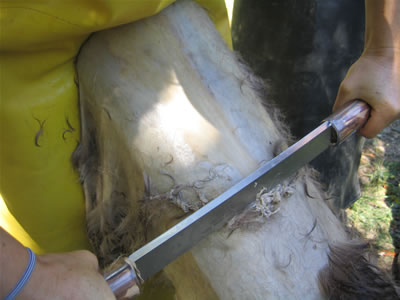
Saturday morning the real workout begins, removing the grain, the part of the skin that holds the hair. Don’t start unless you can easily push the hair off with the palm of your hand. Any grain missed will make the hide stiffer and will prevent the smoke from entering the skin when smoking it later on. It is easy to see where bits of the grain has been missed on the finished skin, they will be litter with a different texture. The key here is to split the grain from the skin, staying between the grain and the skin and not rolling over the grain. Your knife must be sharp enough to wedge between the two but not so sharp to damage the skin. It takes a skilled person about an hour per deerskin.
Traditional Bone Scraper A deer bone leg works great but must be sharpened through out the process. It is cool to do the whole process with stone age tools. Graining with the Stone Age Tools These tool steel knives work much faster than the stone age tools, but it is nice to know that I can do it with primitive technology.
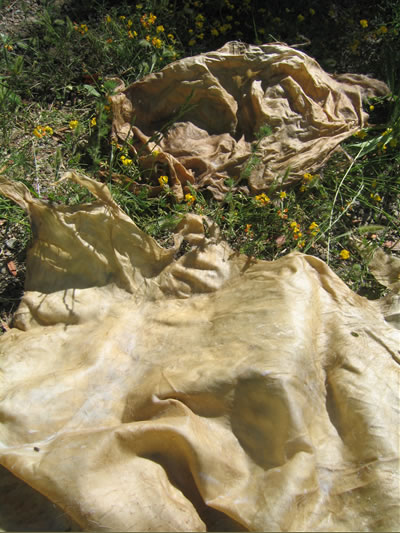
After the skins have been grained, set them in the sun to dry, it should take no more than an hour on a dry sunny day. In our classes, the skins are typically ready to be died by lunch. After lunch, they should look and feel like hard sheets of plastic. This process will make the next step much easier and more productive.
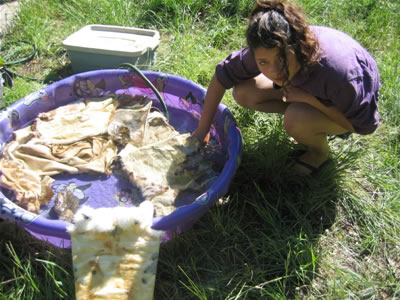
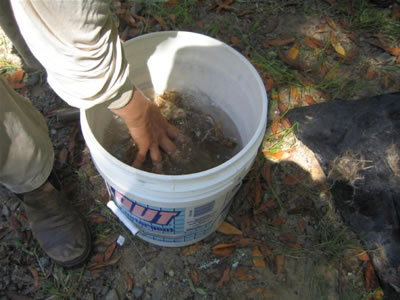
Re-hydrate
This is done in a creek or a kids pool. This should not take more than about 15 minutes, stubborn places that seem to stay hard and dry can be worked over a stake. These spots may be where the grain may not have been completely removed.
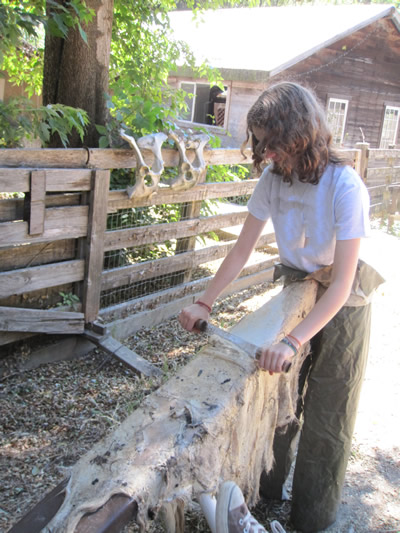
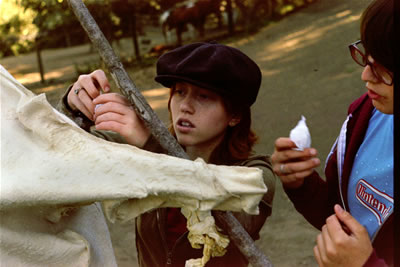
Membraning
This is the removal part of the skin that holds the blood vessels. When done correctly will leave a pattern of where the blood vessels had been, this is a distinctive look of quilty traditionally tanned buckskin; If poorly done will have a patchwork of light spots and tags of fibers on the finished buckskin.
Using the fleshing knife remove the membrane. Again this is a process of splitting the membrane from the skin. When doing this process with fur on you do not have a smooth surface to work on and if you go too deep you will start to see the roots of the hairs. Like the grain, if any membrane is left the hide will be hard and will prevent the smoke from penetrating the hide. This is the last chance to have to make sure off the memberane and remaining grain is removed.
Vinager Rinse, Wring, and Open
The first rinse I add a quarter cup of vinagar to two-and-one-half gallons of water to ntralize the now alkaline skin. The skin will likly swell again; wring and open and rinse as decribed below, and repeat again untill the skin stays thin.
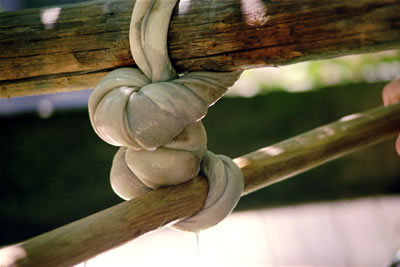
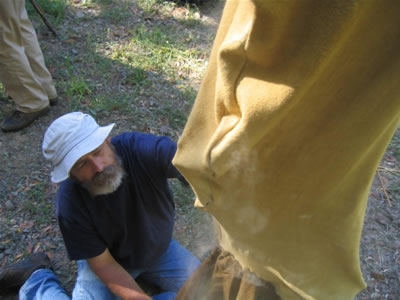
Wringing
Wrap the hide so it forms a donut with the outside of the skin out. Wring in one direction then the other, then rotate the hide and do it again. Do not let the dry just wring out the water you want the skins thirsty but not dry.
Open up the skin
Opening the skin will make the skin be more thirsty and will do a better job of taking up the brains.
Fresh Water Rinse, Wring, and Open
If you do this 3 or more times or use couple of wash and spine and rinse and spin cycles in the washer you can move on with the next step. or At the end of the day the skins are put in a big tub and fresh water is run over them through the nigh or if you are blessed with a flowing streem sequre and submerger them in the flowing water. When the hide is sufficiently rinsed the hide will feel loose and thin.
IF YOU ARE MAKING RAWHIDE AT THIS POINT YOU ARE DONE
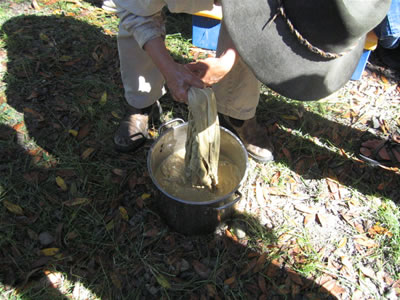
Dress the Skin
Do not let the skin get dry but immediately submerge the skin in the solution of dressing (tanning) solution. It takes one brain or dozen egg yokes in about 1/2 gallon of water. Either solution will sour within hours so this can only be made minutes ahead of time. After you feel confident that 100% of the skin had absorbed the dressing solution let it stand for about 20 minutes. Wring the skin out collecting the solution, open it up, submerge it again and do this 3 or more times. This assures that all the fiber bundles have been penetrated with a dressing solution.
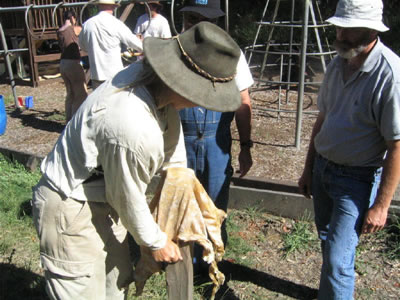
Softening
After the last wringing keep the hide in motion stretching, pulling over a stake, and cable switching it up constantly. The key here is if the skin dries when not in motion it will become hard and you will have to repeat the dressing process. This is another time the weather should be sunny and dry. I taught this workshop in Haiti and it was so humid we could not finish this step. When you think it is done hold it to your face if it feels cooler than the air it still has too much moisture. It takes us typically to the end of Saturday. As a part of the next process, we will trim the skin to make a nice uniform edge and put them in the glue pot described in the next step. I suggest that when you think the skin is dry fold it up, wrap it in a damp but not wet cloth, seal it in a freezer bag, put it in the freezer. I have found over the years that hides that have been frozen during this process seem to always be a little more supple.
The next morning when we take the skins out of the freezer those that are 100% supple over 100% of the skin are done. Those that stiff frozen places simply need to be worked some more. We always smoke the hides after lunch on the last day of the workshop. Before lunch, even if we are sure the skins are dry put them back in the freezer and checked again after lunch. If it gets hard in any places it is because those places dried without being in motion. Rehydrate only that part of the skin with a fresh egg solution and continue to soften it until it is dry and loose. The rumps and neck can be problematic for first-time tanners.

Making Hide Glue
We will need hide glue during the next process. Each morning the glue pot set up to simmer. After the graining and membraning, any trimmings are cut tiny and join any other scraps leftover from making project leather projects in the glue pot. We packed the pot tightly with these tiny trimings, cover with water, and left to simmer. I use a commercial luthier’s glue pot that keeps the temperature correct for doing the job. After the scraps look like overcooked spaghetti they are scooped out and it is left to continue to simmer down; when it is the consistency of cold syrup it is ready to use. If it is still too watery when we need it I will add dried flakes left over from the last project. After we are done using the glue any leftover is poured no deeper than an eighth of an inch into pie tins to dry in the sun. After the glue has dried, they are broken up and sealed from humidity until needed.
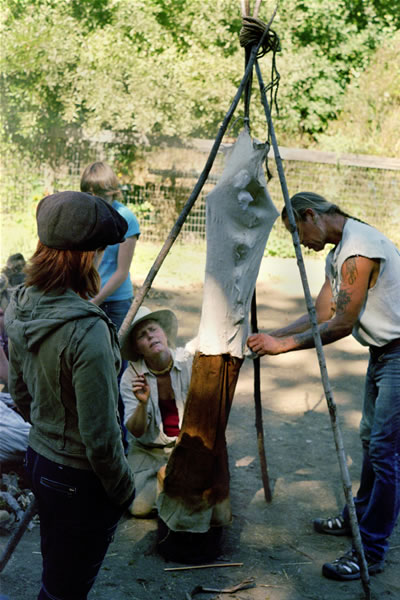
Tenting
In preparation of the next step, the edges of the skin are stitched and glued, and any holes plugged or patched. The objective form an airtight container for the smoking process. A skirt made from denim or canvas is glued to the bottom to act as a conduit to channel the smoke between the bucket which holds the cool smoky fire and the skins to assure even smoking and protect the skins from excessive heat. A simple “A” frame to suspend the skin tent is made, the skins hung, thin sticks are placed inside to assure that at no place or time the skin surfaces touch each other or even penetration or color will not occur.
Smoke
If the skin was to get wet at this point when it drys the fibers would glue themselves back together again and would become hard. Smoking the hide will make it unaffected by water. The resins in the smoke penetrate the fiber bundles and prevent them from gluing them back together again regardless of whether it gets wet.
There are many ways to do this based on what you have available to you; an old 5-gallon buck works well to hold the smoke and channel it up through skirt. I have also used an old wood with a short length of stove pipe. Key is keeping it cool, keep it smoky, and get the smoke in the skirt.
This needs to be a cool smoking fire made with punky red-fir. Keep a hand in the smoke to feel that continues to produce cool damp smoke. If it starts to feel dry add more punky red-fir immediately. It stops smoldering and starts to flame the hides will be ruined with all your hard work. Your beautiful buckskin can from white to brown to black to smoldering in spots or in large sections heartbeat.
If the tent is nice and airtight there will be higher pressure inside than out so the smoke will penetrate the skin.
When the color starts to come through 100% IF YOU ARE DOING A SKIN WITH FUR ON YOU ARE DONE. For top grain leather and buckskin of the skins turn it inside out and smoke it again, this takes about 10 min. per side.

Finished Buckskin Sunday Afternoon Hand made buckskin feels great, it moves, breathes, is washable and smells great.